#02 DOF Depth of field, part 1
DOF Depth of field, part 1
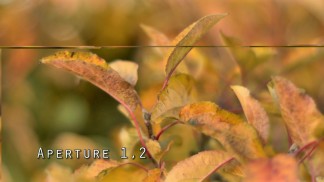
In our last episode we defined the aperture. That’s a prerequisite for many thinks – such as the DOF (depth of field), which I would like to explain in this episode. Let’s have another look at our leaves.
The leaves recorded with an aperture of 1.2 look a bit blurry – at least behind and in front of a very small area. The leaves, which are pretty crisp are at the point of focus, which has here about 2 m distance to the camera, let’s call it the ” videographers point of view”. The other picture, which had been taken with an f-number of 22 is significantly sharper in comparison to the one with an aperture of 1.2. However, distance and point of focus were kept the same.
Strictly speaking – you can only focus at one distance, let’s say at 2m and everything which is behind or in front of your focal point is going to be less focused – it doesn’t matter which aperture you chose. Now, there are many parameter in this game, which we are all going to discuss, – but there is an established area behind and in front of the focal point, which many people would consider to be acceptably focused. This is the so called depth of field (DOF). There is quite a bit of debate on what is “acceptably focused”. A term, which is frequently used is the circle of confusion, which defines this blurriness. If the blurry area is smaller than the image resolution then an area is considered “acceptably focused” .
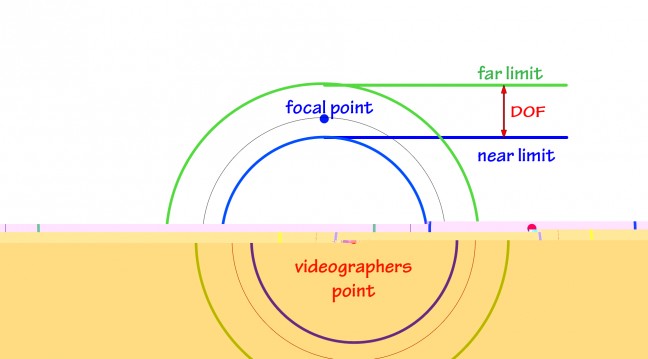
The situation of our leaves can be translated into an illustration above. We have our videographers point of view and the point of focus. The area behind the focal point is called far distance. And the area in front of our focal point is called near distance. The near distance, towards the videographers point of view, is always shorter than the far distance.
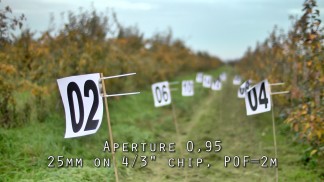
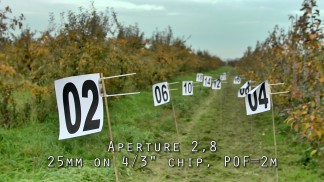
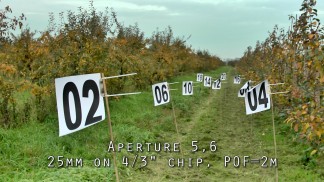
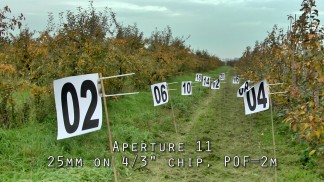
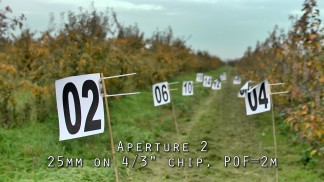
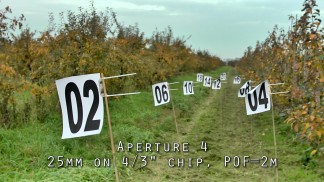
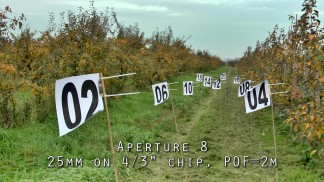
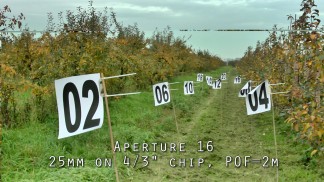
Let’s do a small experiment. I have marked a test area in front of our camera in 2 meter intervals. Then, I focused at 2 meter and changed the aperture from 0.95 to 16. The result you probably guess.
The DOF increases with increasing f-number.
I must confess that I never found a need to calculate the depth of field because I most likely find myself going for a shallow depth of field, so the depth of field is quite short, or I go for a deep focus, with the depth of field quite long. Which aperture I use exactly is than often a bargaining between other parameters, such as motion blur and noise – we talk about this later.
In order to calculate the DOF – there are formulas available. Many of them simplify the real physical conditions quite heavily – so the results don’t match the real world. An example are lenses specifically designed to deliver a softer look, less contrast, when using an aperture of 4 or less. These are designated portrait lenses. Some technocratic people probably would rate these lenses badly – but you don’t want to have an high contrast if you take a picture of the human body or a portrait.
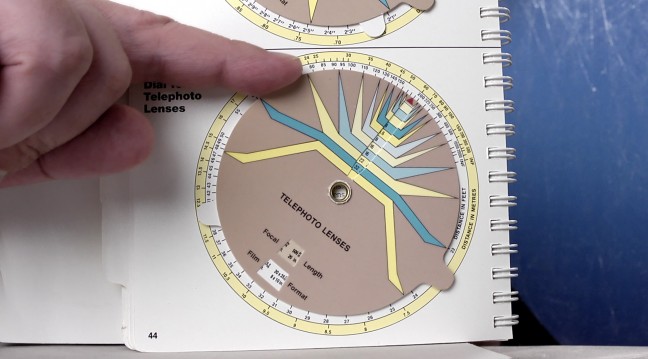
There are some calculator on the internet, but it is always important to know, which formulas they use. There are also some mechanical calculators available, like the one which is shown above. But the problem is always the same, which model have they used in order to get the numbers? Many photographical – or videographical equipment available allows you to visualize the DOF, so you can see it, rather than calculating it.
Photography or videography is an art and not a science. There isn’t a proper or correct exposure – you can only expose for different looks. Today, it is quite fashionable to have pictures with this shallow depth of field. In the 30th we had movements, such as the f/64 group or f/180 school, which preferred pictures of deep focus. Despite this artistic nature, physics shouldn’t be neglected because it can help us to control the outcome of our artwork.
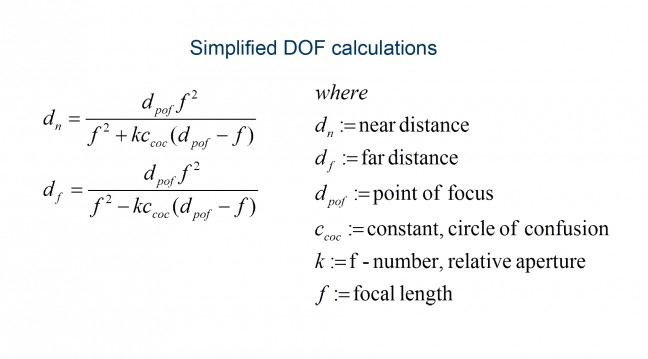
Let’s take these simple equations, which model the depth of field in a simplistic manner.
We defined our depth of field as the difference between the near distance and the far distance. Here, dn is the near distance and df the far distance. The DOF therefore is a function of four parameter:
- the focal length
- the point of focus
- the relative aperture and
- the circle of confusion, which is a constant and depends on your sensor size.
During the old days of film, lenses had been calibrated in order to see the DOF on a scale.
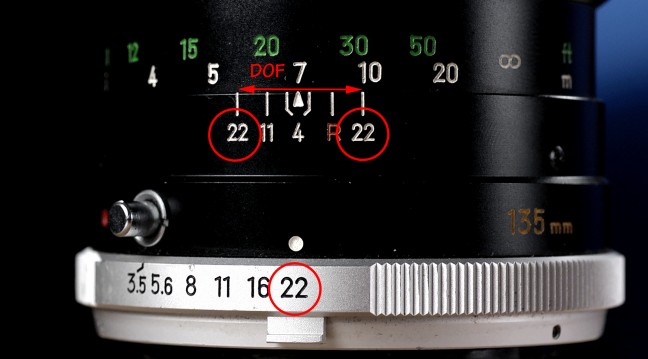
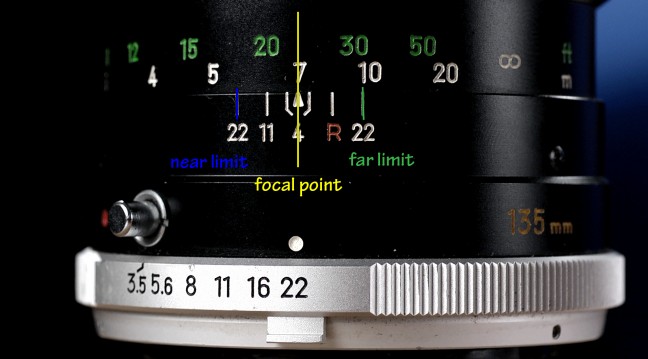
The picture above shows the calibration scale of a 135mm lens. It shows us the f-number (or relative aperture) and the focus ring shows us the point of focus (POF). This little R is used for infrared photography, so if you want to take a picture with IR-Film you need to correct the distance. This is because our POF depends also on the wavelength – strictly speaking. We talk about those thinks later.
Let’s say our POF is at 7m and we use an aperture of 22 then our near distance is at about 5,75m and our far distance is at about 10m. This is only valid for 35mm film! If you use your lens on a camera with a different sensor size – which many different digital still or film cameras have, then this scale is wrong – because our DOF is a function of the circle of confusion, which is related to the sensor size. Some people complain that these new lenses don’t have this DOF scale anymore. That’s the reason. Because lenses are nowadays used on cameras with different sensor sizes. Therefore, a DOF scale in a classical manner, isn’t of any use anymore.

